Some home decoration sites suggest that you use plywood disks, which must be cut out of wooden sheet. This can be a challenge if you don’t have the proper tools and possibly suffer from a lack of carpentry skills. Our plans are based on these instructions, but instead of using plywood disks, we’ve added a few extra twists. For example, by upcycling readily available reclaimed wooden wire spools, using Lazy Susan bearings to accommodate the hole in the center of the spool rounds, and screwing specialty picture hangers in each divider, you’ll save time, space, and money. First, you need to head on over to any decent hardware store to pick up the proper materials. Materials:
20 or 24 pcs ½ inch plywood for shoe dividers. Size: 10 inch x 5 ½ inch 5 pcs 1/2 inch plywood for boot dividers. Size: 20 inch x 5 1/2 inch 5 wooden wire spools. Diameter: 28 inches 2 pcs 1/2 inch plywood for base length. Size: 18 inch x 2 inch 2 pcs 1/2 inch plywood for base width. Size: 17 inch x 2 inch 4 or 5 Lazy Susan bearings with 4 screw holes 40 3/4 inch nails 12 picture hangers or regular hooks Wood Glue Paint Protractor Screw Driver Adjustable Wrench
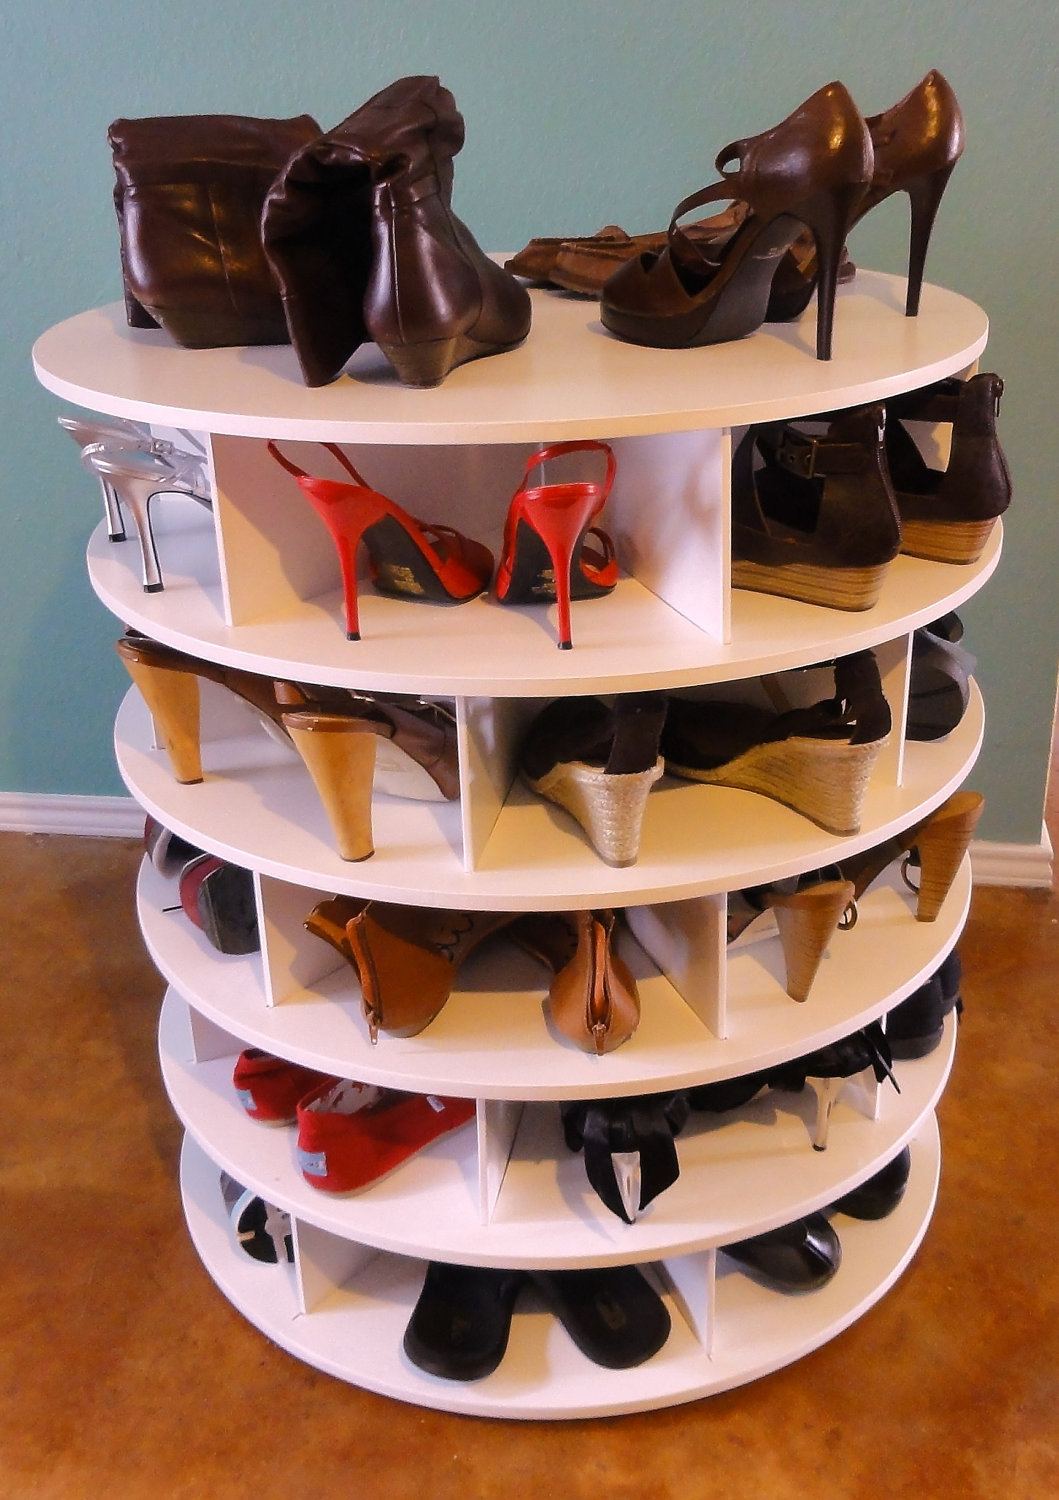
Disassemble the wire spools by undoing the connecting bolts with the adjustable wrench. Remove the wood slats and set them aside along with one spool round that you can use for later projects. Cut all the divider boards. With the exception of the boot-sized dividers, you should be able to use one standard size three foot reclaimed pallet. Measure the gluing lines using the protractor. You should have one divider every 60 degrees (6 dividers per level). Pay special attention to the center or the dividers will be misaligned. Glue the dividers in place with one nail to hold them in place until they dry. Glue and nail the top spool round to the dividers. Repeat for the next 4 levels, or use boot dividers for one level if you’d prefer. Glue and nail the rectangular base together. Glue and nail one more spool round on top. Screw picture hangers or regular hooks in each shoe divider for sandals and shoes. Paint all of the pieces and allow them to dry. Center Lazy Susan bearings on the base and between each level. Screw them in place. Assemble your levels and you’re ready to start filling up your DIY Lazy Susan with shoes! Credits: http://theownerbuildernetwork.co/easy-diy-projects/diy-lazy-susan-shoe-storage/ Featured photo credit: Lazy Susan shoe rack / Remodeling Ideas via remodelingideas.work